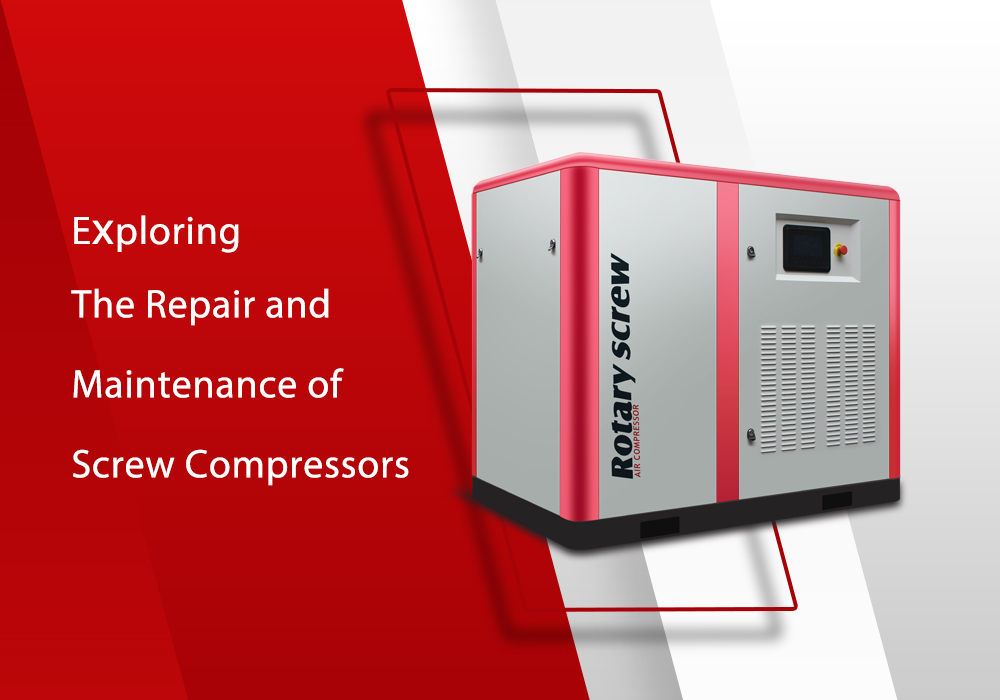
The smooth operation of a screw air compressor is directly related to the normal functioning of the company's production, which also affects its economic performance. Therefore, the daily maintenance and troubleshooting of screw air compressors are particularly important.
The Benefits of Screw Air Compressors
The screw air compressors adopt high capacity compression components with low rotor speeds and optimal oil injection, to achieve high efficiency and reliability. Currently, manufacturers’ designs ensure extremely low system temperature and compressed air temperature, to achieve optimal cooling effect and maximum service life. The maintenance-free, high reliability, and high efficiency of screw air compressors are the driving principles behind their development.
The innovative compressor design of screw air compressors saves unnecessary maintenance costs. All components are designed for long service life, including large-sized inlet filters and oil filters, and fine separators to ensure optimal compressed air quality. All oil filters and separator components for various models up to 22kW (30hp) are centrifugal-type with easy access, further reducing maintenance time. The “Express Maintenance Point” enables repairs to be completed in minutes, reducing downtime and repair costs considerably.
The combination of precision instrument and operation is essential while reducing costs, and almost all screw compressors are equipped with intelligent systems that feature user-friendly and easy-to-use menus.
The Maintenance of screw air compressors
Screw air compressors are divided into the maintenance of air filter replacement, oil filter replacement, maintenance and replacement of components’ lubricating oil.
1. The Maintenance of The Air Filter
The air filter is a component that filters out dust and dirt from the air, allowing clean air to enter the compression chamber of the screw rotor for compression. Due to the internal clearance of the screw compressor, only particles smaller than 15 microns (15u) are allowed to filter out. If the air filter element is blocked and damaged, a significant amount of particles larger than 15u can enter the internal circulation of the screw compressor, which not only greatly shortens the service life of the oil filter and fine separator, but also leads to a large amount of particles entering into the bearing chamber, accelerating bearing wear and causing an increase in rotor clearance. This leads to reduced compression efficiency and, in severe cases, rotor seizure.
Note: When cleaning or replacing the air filter, the components must be aligned one by one to prevent foreign objects from entering the intake valve. Regular inspections should be conducted to check for any damage or deformation in the intake flexible hose and to ensure that the connection between the flexible hose and the air filter intake valve is tight and free from air leakage. If any issues are detected, prompt repair or replacement is necessary.
2. Replacement of The Oil Filter
After the initial 500 hours of operation, it is recommended to replace the oil filter element promptly on newly purchased machines. When installing a new filter element, it is advisable to add oil specifically designed for screw compressors. When installing a new filter element, it is advisable to add oil specifically designed for screw compressors. After sealing the filter element, use both hands to tighten it securely back into the oil filter housing. Additionally, it is recommended to replace the filter element and the screw compressor oil every 1,500 to 1,800 hours of operation. In harsh environmental conditions, the replacement interval should be shortened. It is strictly prohibited to use expired oil filter elements, and they must be replaced in a timely manner. Failure to replace them promptly can result in severe consequences due to excessive filter element clogging.
3. Maintenance and Replacement of Oil-Gas Separator
The oil-gas separator is a part that separates the lubricating oil from the compressed air. Under normal operation, the service life of the oil-gas separator is about 3000 hours, However, in harsh operating environments, it is necessary to shorten the maintenance and replacement cycle of the air filter element and even consider installing a pre-air filter. The oil-gas separator must be replaced when it reaches its expiration date or when the pressure difference exceeds 0.12 MPa.
Replacement Procedure: Remove the various control pipe fittings attached to the oil-gas barrel cover. Take out the return oil pipe inserted into the oil-gas barrel from the cover. Unscrew the fastening bolts securing the oil-gas barrel cover. Lift off the oil-gas barrel cover and remove the oil-gas separator. Remove any asbestos gaskets and debris stuck to the cover plate. Install the new oil-gas separator, ensuring that the upper and lower asbestos gaskets are properly aligned and secured with nails or staples. When tightening, make sure the asbestos gaskets are neatly arranged to prevent gasket blowout. Reassemble the cover plate, return oil pipe, and various control pipes as they were originally positioned. Check for any leaks.
4. Replacement of Screw Compressor Oil
The quality of the screw compressor oil has a decisive impact on the performance of the oil injection screw compressor. Good oil should possess excellent oxidation resistance, quick separation, good bubble clearing, high viscosity, and effective corrosion prevention.
Therefore, it is necessary to use genuine specialized screw compressor oil.
During the initial break-in period, the first oil change should be performed after 500 hours of operation. Subsequently, the oil should be replaced every 2000 hours of operation. It is recommended to replace the oil filter simultaneously during the oil change.
Replacement Procedure:
- Start the compressor and let it run for 5 minutes to raise the oil temperature above 50°C, which reduces the viscosity of the oil. Stop the compressor.
- When there is a pressure of 0.1 MPa in the oil-gas barrel, open the drain valve at the bottom of the barrel and connect it to an oil storage tank.
- Slowly open the drain valve and wait until the lubricating oil drips before closing the valve.
- Unscrew the oil filter and drain the lubricating oil from all the pipelines.
- Replace the oil filter with a new one. Open the oil filling port and pour in the new oil, ensuring that the oil level is within the range indicated on the oil level mark.
- Tighten the oil filling port and check for any signs of leakage.During the use of the lubricating oil, if the oil level is found to be too low, promptly replenish it with new oil.
- It is also important to regularly drain condensate water, preferably once a week. In hot weather conditions, draining should be done every 2-3 days.
- Mixing different brands of lubricating oil is strictly prohibited, and it is important to avoid using lubricating oil beyond its expiration date.
Learn more details about how to change the oil.
5. Maintenance of the Cooler
During long-term use, screw air compressors can experience malfunctions due to improper operation or aging of internal components, resulting in the machine’s inability to function properly and affecting smooth daily production. Generally, the failures of screw air compressors can be attributed to the following aspects: compressor issues, internal pressure problems, oil level problems, and oil temperature problems. Different types of failures require different maintenance methods.
The following measures can be taken:
Compressor issues: Typically, the air compressor may experience the inability to start, which occurs when the fault signal on the control panel remains active even after the underlying issue has been resolved. To address this particular fault, the following maintenance method can be employed: access the control panel, retrieve the fault information, click on the confirmation button, and perform a system reset.
Internal Pressure Problems: Internal pressure issues in screw air compressors often involve excessively high or low pressure.
Causes and maintenance methods for high internal pressure:
- Sensor malfunction: To address this issue, the faulty sensor can be replaced to eliminate the malfunction.
- The filter element of the oil-gas separator is blocked, causing the gas to be unable to be discharged in a timely manner and resulting in increased pressure inside the tank. To address this issue, the filter element of the oil-gas separator can be replaced to eliminate the malfunction.
- The minimum pressure check valve fails to open. For this reason, the malfunction can be resolved by replacing the check valve spring.
Causes and maintenance methods for low internal pressure:
- Clogged intake filter: To address this issue, replace or clean the filter to remove the blockage.
- Stuck intake check valve: To resolve this issue, replace the check valve spring or the valve body to ensure proper functioning.
- Inoperative intake valve: To fix this issue, replace the solenoid valve or check the wiring of the loading solenoid valve.
- Leakage in the exhaust piping: To address this issue, tighten the unloading solenoid or replace the faulty unloading solenoid.
- Penetration of the oil-gas separator filter element: To resolve this issue, replace the filter element of the oil-gas separator.
Oil Level Problems: In terms of oil level, there is often a phenomenon of reduced oil quantity due to a decrease in oil level. The main reasons for this phenomenon are as follows: 1. Penetration of the oil-gas separator filter element. 2. Blockage in the return oil pipe or throttle valve. 3. Damage to the head oil seal or oil guide pipe. 4. Damage to the machine used for oil cooling. 5. Malfunction of the head check valve. 6. High oil temperature. 7. Improper specifications of the copper pipe used for oil return or improper alignment with the tank wall.
The main maintenance methods for these causes are as follows:
- Reduce the pressure difference between the internal and external systems, and reduce the oil content in the air. Additionally, replace the filter element of the oil-gas separator.
- Clean or replace the return oil pipe.
- Clean the oil mist at the shaft end.
- Separate the oil from the cooling water.
- Replace the sealing valve.
- Compress the oil content in the air.
- Cut the steel pipe at an angle.
Oil Temperature Problems: In terms of oil temperature, the problem of high oil temperature often occurs. The causes and maintenance methods for this problem are as follows:
- High temperature of the cooling water: Adjust the incoming water temperature and clean the filter. Increase the water flow rate if necessary.
- Scaling in the oil cooling device: Disassemble the cooling device and immerse it in a specialized cleaning solution for thorough cleaning.
- Insufficient oil quantity: Add oil to ensure that the oil level is above the minimum level.
- Poor oil quality: Regularly replace the oil to ensure its purity and cleanliness.
Maintenance of the air compressor is essential requirements for its proper functioning and are even more critical for the compressor system. Only by regularly inspecting the screw air compressor and timely replacing relevant components can the normal operation of the machinery be ensured, thereby ensuring the continuity and stability of the factory’s production and bringing higher benefits to the factory.
